17.3.1 System Features Views
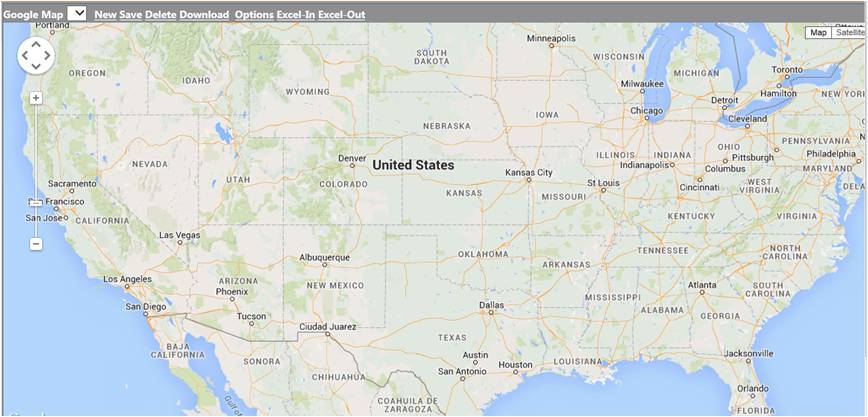
Figure 17.3.1.1 Google Map view
Views- Both Map and Satellite views.
First Location - GMap will apply the first location and ratio if you are first use Google map. If not, the window will show the first map on the saved list.
Drag & Scale – Left click and drag left, right, up and down to find out the direct location. Click the left button to zoom in and zoom out to choose the ratio.
Marker Information
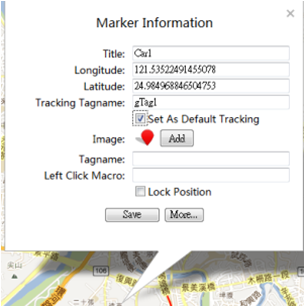
Figure 17.3.1.2 Marker Information configuration
Title: The marker’s name, The marker can’t save without a title.
Lat & Lng : Latitude and Longitude. Choose the location, the Latitude and Longitude of the location will show on the Marker information. If you want to type the correct Latitude and Longitude, follow these rules:
The range of Latitude: -85 ~ 85
The range of Longitude: -180 ~ 180
There is no map out of the range
Tracking Name : User can type Tag Name from GPS driver setting. Marker will follow the GPS tag information on Google Maps when typing Tracking Name. Marker will show with set Latitude and Longitude on Google Maps without typing Tracking Name.
Set As Default Tracking : Chose the Checkbox, screen will move to the center of the Google Map Marker at runtime.
ADD: Choose the image for the marker. You can upload images as icons to the map, and notice that the file image must be less than 10 KB. (Because the image file is PNG, GIF or JPG, not ICO, the window will show the image not an icon.) If you want to delete the image you uploaded, click Remove under the image.
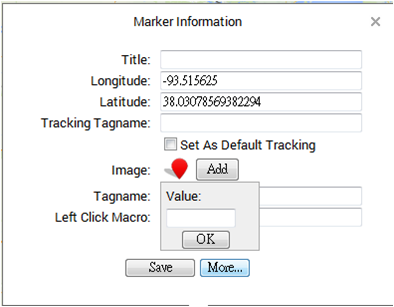
Figure 17.3.1.3 Marker Information configuration-2
Set the number value as follows:
① One or more measured value: Separate by “,”. For example: “1, 2, 3”, when measured value is 1, 2 or 3, the image set value will show on the map.
② One or more measured range: Separated by‘,’. For example :‘(0,5),[10,20]’, when measured value will >0 and <5, the image set value will show on the map. Or when measured value >=10 and <=20, the image set value will show on the map.
③ Mix ① and ② : Separate by‘,’
After setting the value, click OK. Move mouse to the image, the name and value of the image will be shown.
Tagname : Type the Tagname to connect the Web access node, if the name is the same as the tag node. The marker can show the value of the tag node on the map after typing the Tagname.
Left Click Marco : A left-click Macro can be associated with a marker. Left Click Macro define the movement of left-button of mouse during running WebAccess. For example:‘<GOTO>GRAPH=Haidian.bgr’.( refer to the Help 11.1(Key macro Commands). It makes no difference without typing.